Adding New Samples#
To add a new sample, navigate to the Samples tab and click the Add New Sample button.
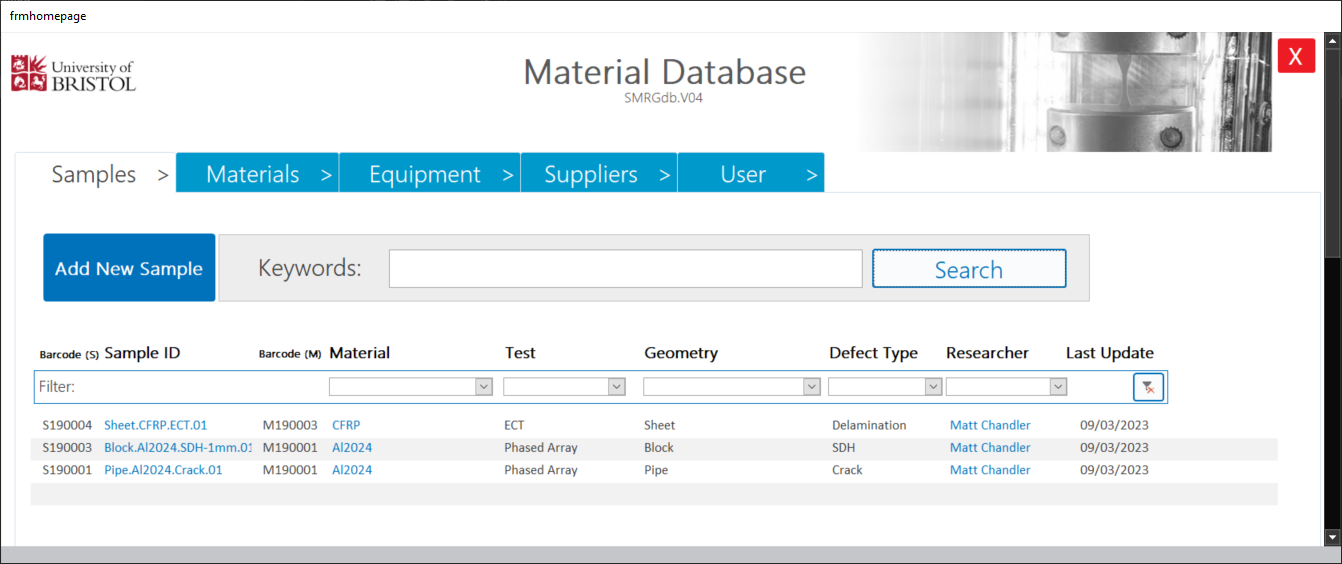
This brings up a new window for a blank sample, which you can enter details for.
An outline of what makes a useful sample record is listed below:
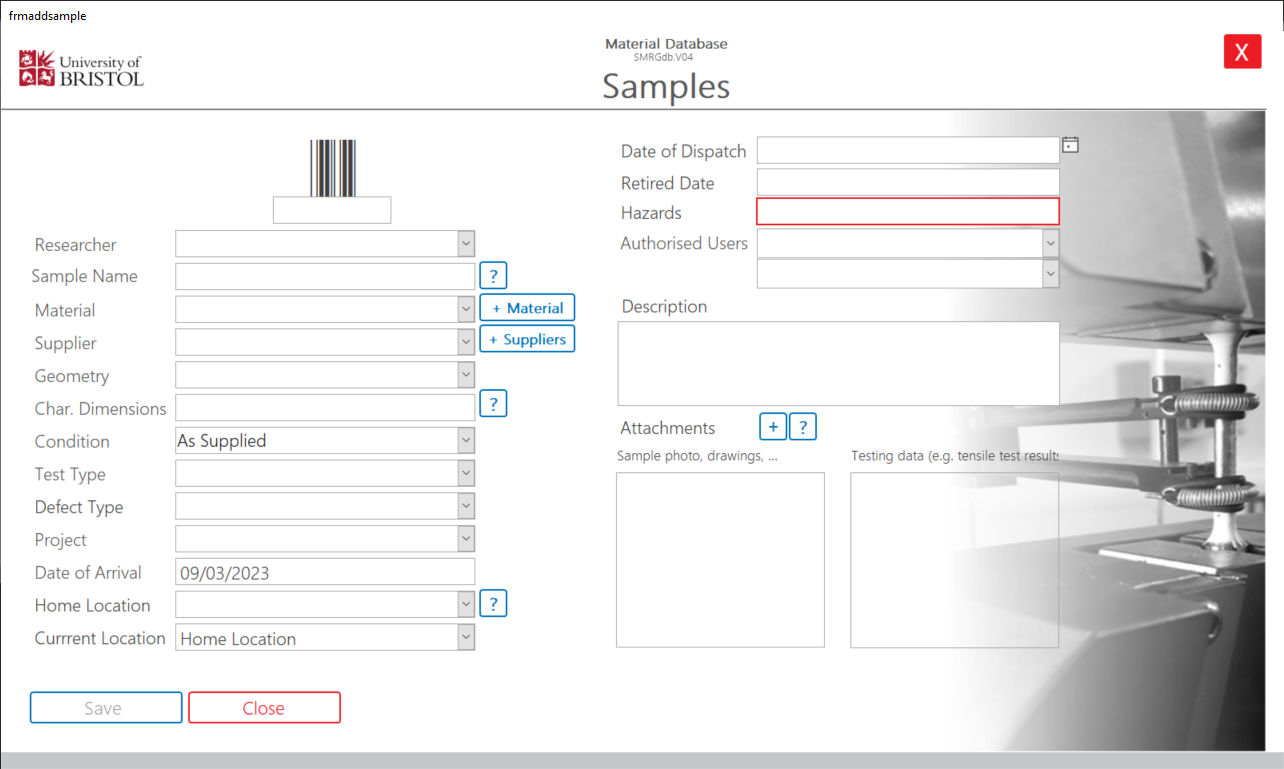
Researcher: The user who is responsible for this sample. This might be the PI of the project it is mostly associated with, or the person who uses it most frequently. This person is considered the ‘owner’ and may make changes to this record later.
Sample Name: An appropriate name for the sample. This should follow a standard set of rules, which can be found by clicking the
?button next to this field. This makes it easier for others to find this sample record later on. Note that while most of this information can be found in other fields, it is good practice to repeat this information here as standard, as this will be the field which appears on the label and makes it easier to identify the sample later.Material: What the sample is made from. This information is not crucial but makes it easier if others are looking for a specific type of material later. Add new materials if it is not present in the list.
Supplier: Who provided us with the sample. Useful to track ownership of each sample later.
Geometry: What type of geometry the component is. This should be a short name like “pipe” or “panel” which describes the part.
Char. Dimensions: The overall size of the part (height, width, depth), and a brief summary of defects. This should be a short description, put anything more extensive in the description.
Condition: Quality of the part. Not an important field and for most cases can be ignored.
Test Type: What type of test the sample is usually associated with. As most samples are tested with several methods, label this as the most common, or what it was originally tested with. This field is useful for reducing repeated work, as others may have already captured the data you need at an earlier date.
Defect Type: The most common type of defect present. Makes it easier to search for samples with specific defects later.
Project: The name of the project with which the sample is most affiliated.
Date of Arrival: The first date at which it arrived in the lab.
Home Location: Where the sample should usually be stored. This should typically be in the UNDT lab.
Current Location: Where the sample currently is. Should be set to “Home location” unless it is currently being tested.
Date of Dispatch: The date that the sample was sent elsewhere. This should be blank if the sample is currently in the lab.
Retired Date: The date that the sample was otherwise removed/disposed of. This should be blank if the sample is currently in the lab.
Hazards: Any hazards which are associated with the sample.
Authorised Users: The users who are authorised to make changes to the record. Typically should be frequent users of the sample.
Description: Any other features of the sample which should be known, e.g. extensive breakdown of defects, testing history, publications, etc. Anything which is too extensive to list elsewhere, or doesn’t fit elsewhere.
Attachments: Additional files which are useful to have reference to. Note that these should be small files (e.g. a photo, pdf drawing), any extensive data associated with the sample should be stored elsewhere (e.g. RDSF, Sharepoint) and a link to it provided in the description.
After you have entered the details for a sample, a unique ID and barcode will be generated for this sample. If the barcode is not generated, you will need to install an additional font to your system. Download the font from the folder UNDb\extra files on the Sharepoint, and install it on your system by opening Fonts in your Settings, and dragging the font file IDAutomationHC39M Free Version.ttf into the Add fonts box.
Printing labels#
The label printer can be used to print out labels which should be attached to all samples which are present in the lab, to keep track of ownership and work which has been previously completed with each sample.
Any sample which is present in the lab for any length of time (i.e. not short-term borrowing!) should be in the database with the relevant fields filled. For example, if you have a sample which is borrowed from a sponsor company for a period of months, this should be entered into the database with the “Researcher” and “Supplier” fields filled as a minimum. (Note that the following information is also available by clicking the “?” button next to “Print label” when viewing a sample entry.)
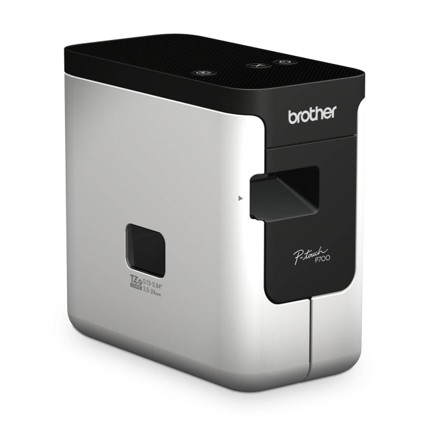
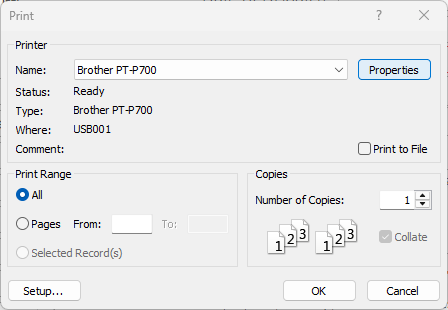
After creating an entry, you will need to print a label using the Brother P-700 label printer. At the time of writing this guide, we keep two kinds of printer tape: strong adhesive (TZe S251), to be used specifically for samples which may be immersed in water for inspection; and regular (TZe 251), to be used with any samples which will never require immersion. Regular tape may also be used with borrowed samples as the adhesive is less strong, so the label is easier to remove.
Connect the printer to your PC with the USB cable. Ensure that the P-lite button is off (i.e. the LED is switched off), and click the “Print label” button. Select the “Brother P-700” printer and open the “Properties” to set up the print.
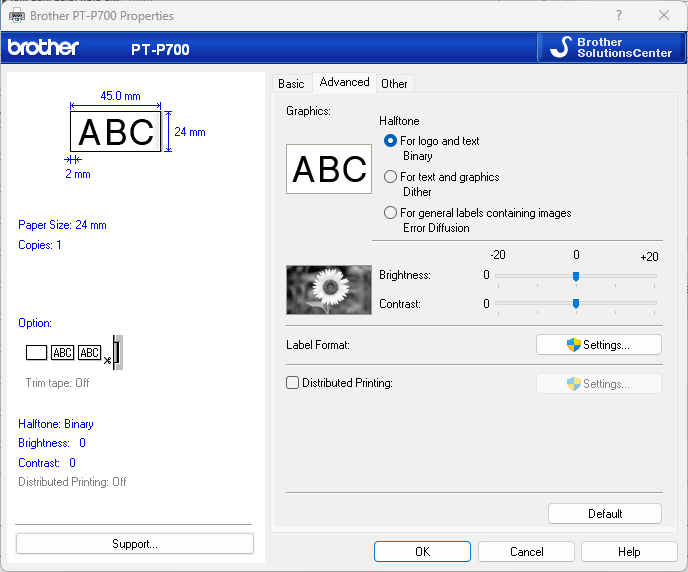
In the “Basic” tab, ensure the “Length” field is set to 45mm, and in the “Advanced” tab ensure that “Text” is selected. You may now close the “Properties” window.
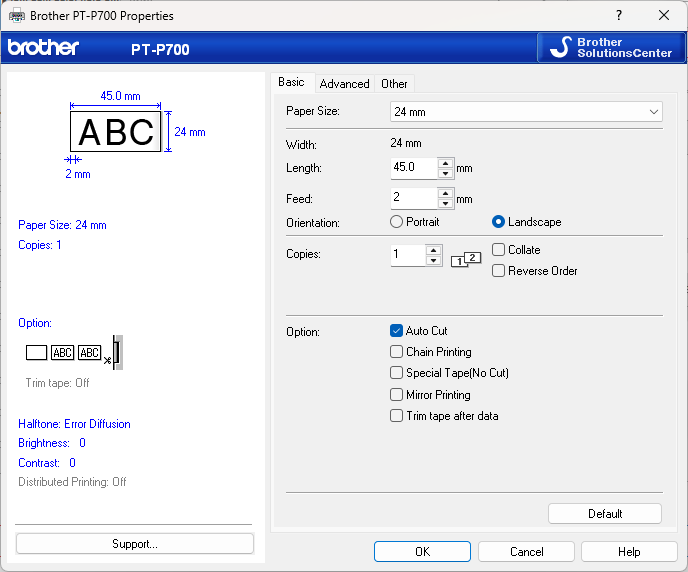
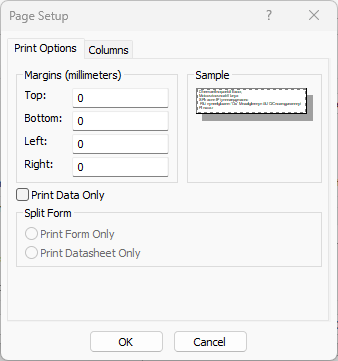
Open the “Setup” window, and ensure that all of the margins are set to 0mm. You may now close the “Setup” window, and print the label.